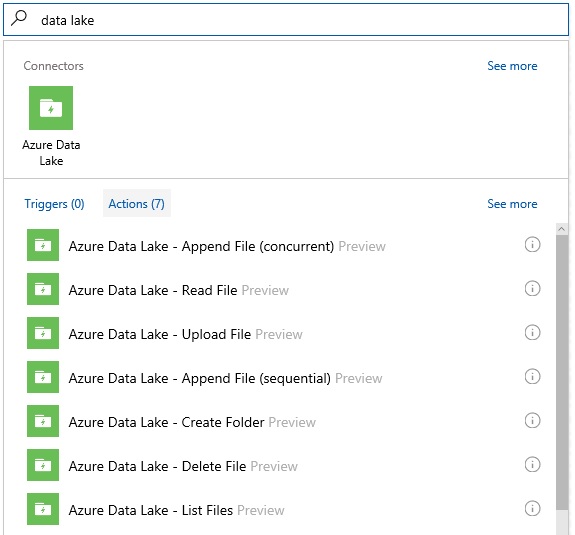
Since a couple of months Azure Logic Apps offers an Azure Data Lake Connector that can perform the following actions on an Azure Data Lake Store:
- Azure Data Lake – Append File (concurrent)
- Azure Data Lake – Read File
- Azure Data Lake – Upload File
- Azure Data Lake – Append File (sequential)
- Azure Data Lake – Create Folder
- Azure Data Lake – Delete File
- Azure Data Lake – List Files
Lately I have noticed several people on forums that are facing “Unauthorized” errors while using the Azure Data Lake connector. In this blogpost I will explain how you can authenticate using a service principal that has been authorized on the Azure Data Lake Store for a specific action. As an example I will show how to create a folder.
Azure Data Lake Store uses Azure Active Directory for authentication. When you use the Logic Apps Azure Data Lake connector, you see that there are two possible ways to authenticate:
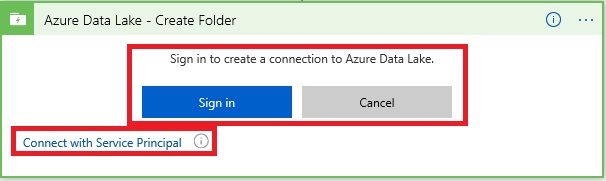
You can either sign in with an Azure AD account, or you can connect using a service principal, the option I will describe. Both options result in a situation in which your Logic App will provide an OAuth 2.0 token that will be attached to each request that will be made to the Data Lake Store.
So what is a service principal? It is basically an impersonation identity of your application which is registered in Azure Active Directory. Using a service principal is preferred instead of running under your own credentials, because:
- You can assign permissions to the app identity that are different than your own permissions. Typically, these permissions are restricted to only what the app needs to do.
- You do not have to change the app credentials if your responsibilities change.
- You can use a certificate to automate authentication when executing an unattended script.
You will receive a service principal object next to an application object when you register an Azure AD application in the Azure portal. You can create multiple service principals in case you have a multi-tenant application. This is not the case for the example I describe in this blog post but I advise you to read the following article to fully understand the concept of applications and service principals, and the relationship between them: Application and service principal objects in Azure Active Directory (Azure AD)
Now let me guide you through the following steps:
- Registering an application in Azure AD
- Granting the service principal access to an Azure Data Lake Store
- Use the service principal in a Logic App to connect with the Azure Data Lake Store and create a folder.
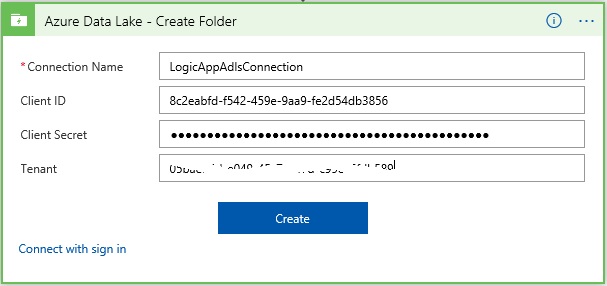
 Let’s first start with what is required to configure the Azure Data Lake connector in the Logic App to use a service principal:

- Connection Name: Display Name of the API Connection that will be created
- Tenant: Directory ID property of your Azure Active Directory tenant
- Client ID: Application ID of your Application Registration in Azure Active Directory
- Client Secret: Key of your Application Registration in Azure Active Directory
Find out your Azure Active Directory ID (Tenant)
Navigate to the Azure portal, then go to the Azure Active Directory page and click Properties. Now copy the “Directory ID” and store it (Tenant property).

Register Application in Azure Active Directory
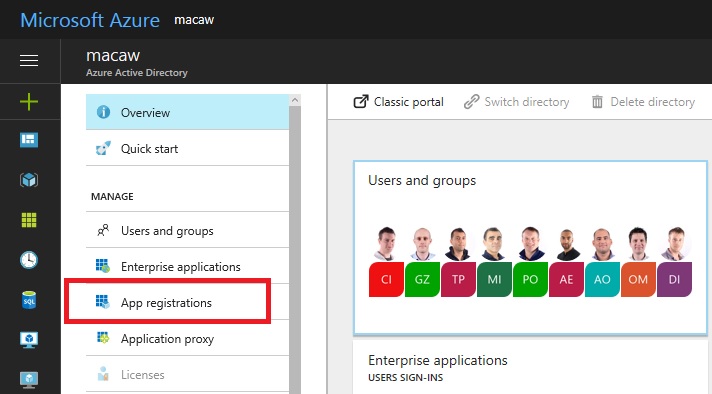
Navigate to the Azure Active Directory page again. On the Overview page, click “App registrations”
Click “New application registration”.

Enter a name for your App registration, choose select Web App / API for application type and enter a dummy Sign-on URL as we don’t intend to use Web Authorization.

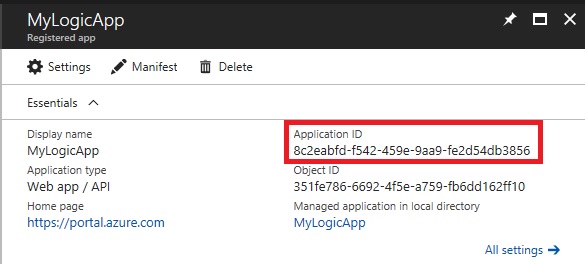
You now probably see a long list of existing App registrations. Search for the one you just created and click it.

Copy and save the “Application ID” value, we need it for the Client ID property of the Logic App Data Lake connector.
Now click “All settings”, followed by “Keys”.

Enter a key Description and choose a duration. A new key Value will be created. Copy and save it. We need it for the Client Secret property of the Logic App Data Lake connector.

Grant the Application Registration (service principal) access to the Azure Data Lake Store
In this example I will grant the Application Registration write and execute permissions, so the Logic App will be able to create a folder in the Azure Data Lake Store.
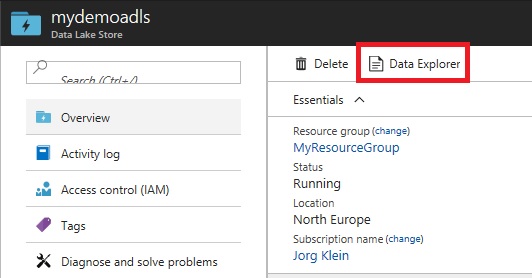
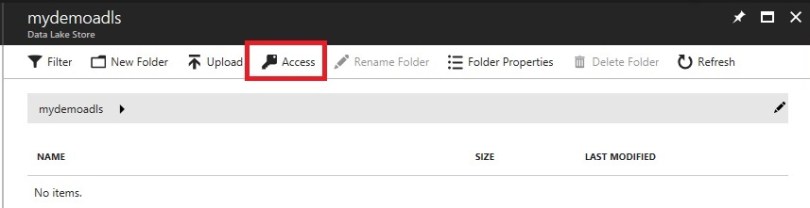
In the Azure portal, navigate to your Azure Data Lake Store. Click “Overview” and then “Data Explorer”.
Click “Access”.
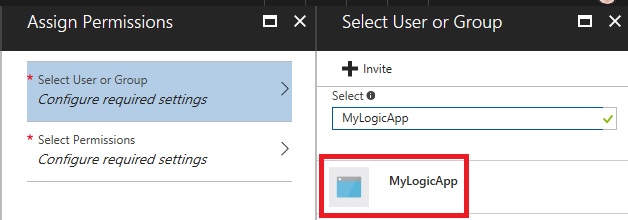
Click “Add”.

You can now search for Active Directory users or groups, but also for Application Registrations. Search on your App Registration name and click it.
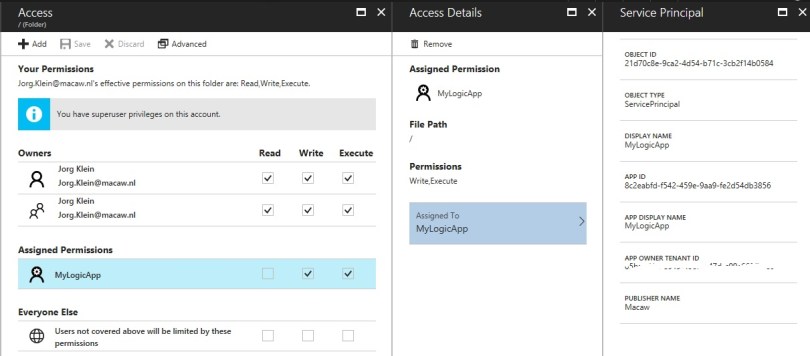
To be able to create folders, Write and Execute permissions are required. In this example I grant access to “This folder and all children”, in my case “this folder” is the root (/ Folder). I add these permissions as “An access permission entry”, this means the permissions are applied to the currently existing files and folders. “A default permission entry” will also be applied to folders and files that are added to this folder in the future.

The permissions have been granted to the App Registration (service principal).
Create the Logic App and use the service principal to connect
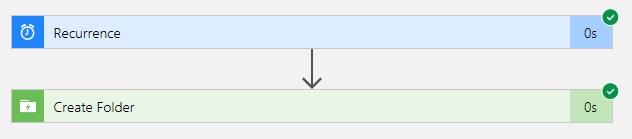
Create a new Logic App from the Azure portal. From the online Logic App Designer search for the Azure Data Lake Actions. Choose “Create Folder”.
Click “Connect with Service Principal”.

Configure the connection using the values we saved in the previous steps.
Now enter your Azure Data Lake Store Account Name. This is just the name of your Azure Data Lake Store. Also enter a name for the folder in the Folder Path box.

You can now click the Run button to test your Logic App which should finish successfully.
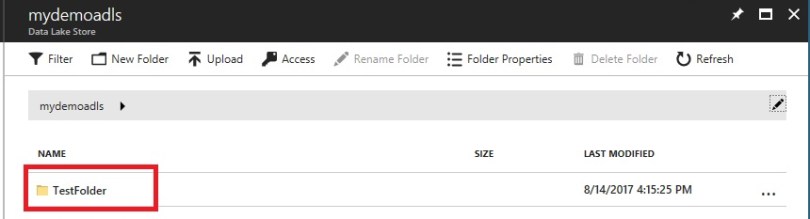
When you now check the Data Explorer of your Azure Data Lake Store you will see the new folder has been created.

The ADLS Upload File connector seems to be limited to file sizes of around 28 MB. This is likely a limitation in the WebHDFS endpoint used by the connector. More information here: https://stackoverflow.com/questions/41464103/30mb-limit-uploading-to-azure-datalake-using-datalakestorefilesystemmanagementcl
LikeLiked by 1 person
Thanks for this article Jorg. Above is working fine when SPN is added from logic app designer in Azure Portal, but no success when logic app is getting deployed from visual studio. Run history is giving error – “Unauthorized”. Any input from you will be a great help.
LikeLike
Hi Shas,
You might need to activate the connection using PowerShell. You can find an example script here:
https://github.com/logicappsio/LogicAppConnectionAuth
This script will retrieve a consent link for a connection (and can also create the connection at the same time) for an OAuth Logic Apps connector. It will then open the consent link and complete authorization to enable a connection. This can be used after deployment of connections to make sure a Logic App is working end-to-end.
Let me know if this solves your problem!
LikeLike
Thank You Jorg for responding. I’ll try this PS script meanwhile I have gone through the script quickly and it seems to me that PS script will be bit chatty and will expect for user to give the consent, thus will receive auth code to continue in getting access token etc. In case the PS script is plugged into CICD pipeline, chatty nature of the script might have to be altered somehow.
One quick question – how does this differ from what we do in azure portal? In that case when we add SPN, it does not show us any consent form!
LikeLike
Hi Shas,
I don’t think this changes much from doing it manually in the Azure portal. The advantage is that it is semi-automated. To be able to do this in a fully automated way, Azure Key Vault integration might be required. This is not possible yet, but you can vote for it here: https://feedback.azure.com/forums/287593-logic-apps/suggestions/17117323-provide-azure-key-vault-integration
LikeLike
Hi Jorg! Thank you for a great article, much appreciated! I’m getting a 403 Forbidden error when I try to use the Logic App to upload a file to any folder other than the main one. Am I missing something on the permissions aspect. I made sure we use the “This folder and all children” when granting the Service Principal access to our Azure Data Lake Store. Any thoughts or tips would be appreciated, thank you!
LikeLike
I am facing the same issue. Did you find resolution for this?
LikeLike